HR can set up defined career paths for employees to choose from. These paths outline a clear sequence of roles an employee can follow as they grow within the organization. Offering pre-built paths reduces guesswork and supports career development. It's especially useful for employees who want to follow an established path rather than create their own.
Setting up defined paths
Step 1. Create defined paths
To create a defined path, you'll be prompted to select job descriptions in Quinto and arrange them in the order employees should follow. Draft and published jobs are available to select, but a path can’t be published until all jobs in the path have been published.
-
Click Jobs in the top nav.
-
Click Jobs on the top left of the page.
-
Select Career paths in the dropdown.
-
Click Create on the top right of the page.
-
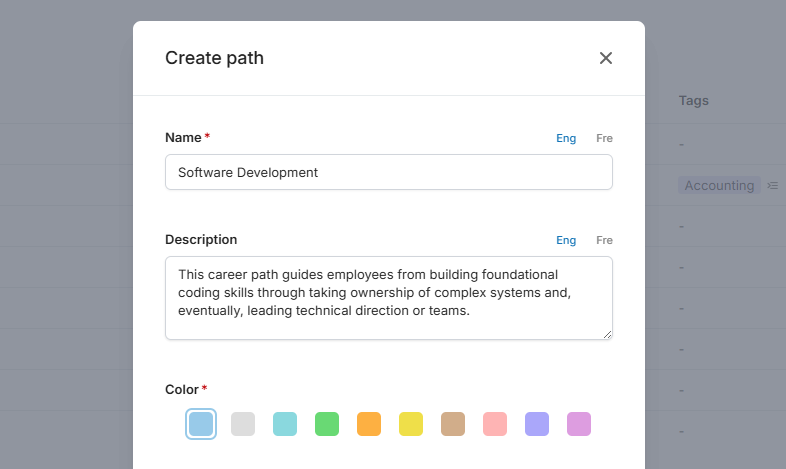
Enter a name for the path.
-
Add an optional description (visible to employees when they view path details).
-
Select a color, add optional tags, and click Create.
-
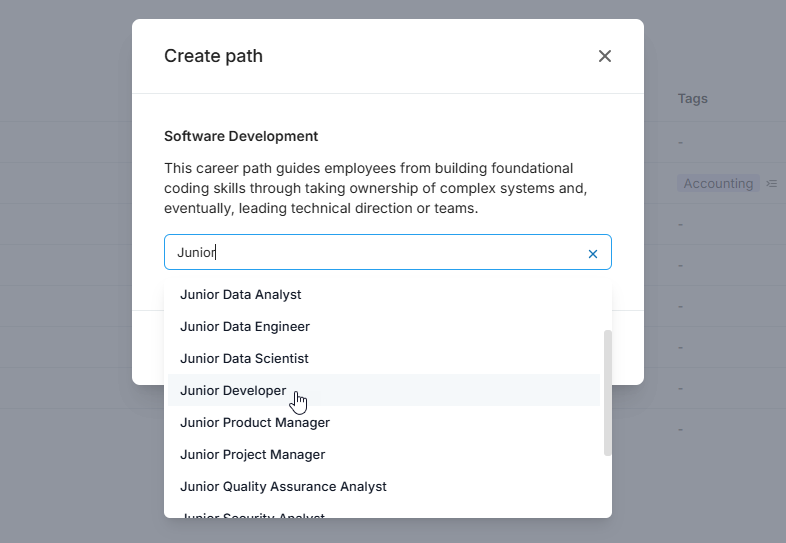
Click +Add job. Search for and select at least two jobs.
-
Click Save and select either Save draft or Publish pathway in the dropdown.
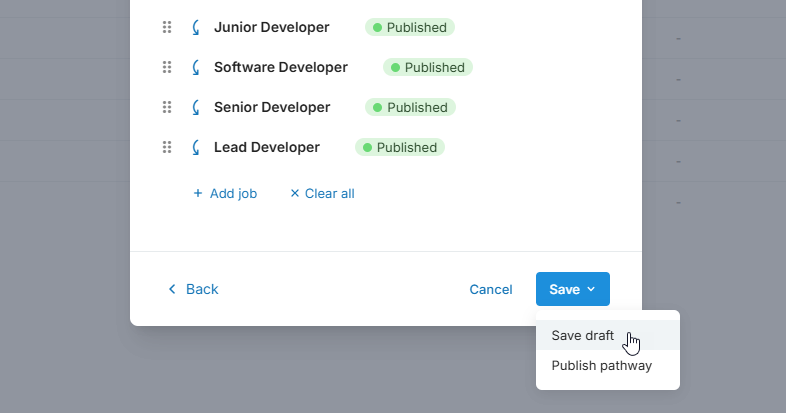
Only published paths will be visible to employees.
Step 2. Review defined paths
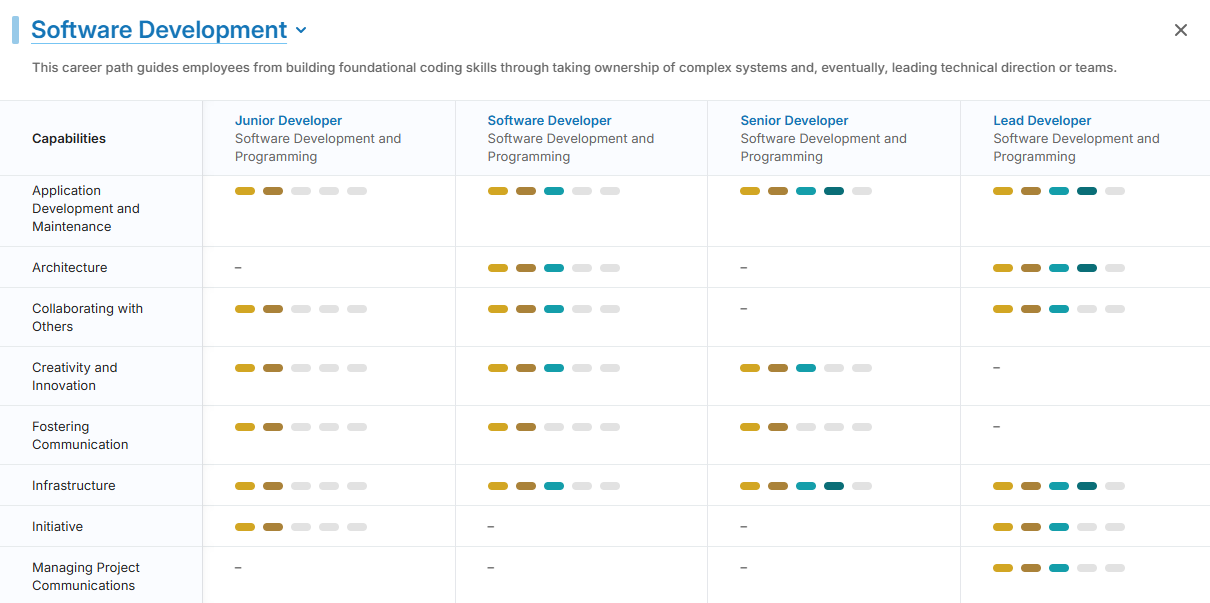
Once a path is created, click its name in the table to view the details. You'll see a table showing all competencies and skills across each job in the path, along with the required levels. This makes it easy to review how the requirements progress and confirm that the path is logical and realistic. You can also click any level in the table to see the behavioral indicators.
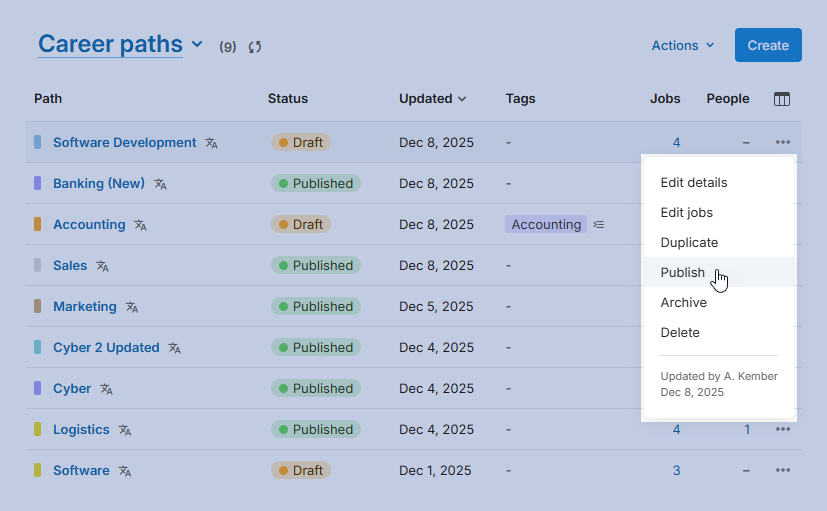
Step 3. Publish defined paths
You can publish draft paths directly from the table. Note that in order to publish, a path needs to have at least two jobs, and all jobs in the path need to be published. Once published, the path becomes available for employees to save to their profile.
-
Click Jobs in the top nav.
-
Click Jobs on the top left of the page.
-
Select Career paths in the dropdown.
-
Find the path and click the 3-dot icon.
-
Select Publish in the dropdown.
Step 4. Give employees access
Users with permission to access career paths can explore roles and create their own path. However, the option to view defined paths is controlled by a separate site-wide setting. Follow the steps below to make defined paths available to employees.
-
Click the gear icon on the top right of your screen.
-
Select General administration in the dropdown.
-
Click Career paths under Features in the side menu.
-
Turn on the Defined paths setting.
Updating or reusing defined paths
How to edit a defined path
You can edit a path, even if it’s already published and saved to profiles. Employees who have saved the path to their profile will see note that says 'There's a new version of this path' and an option to update the path in their profile.
-
Click Jobs in the top nav.
-
Click Jobs on the top left of the page.
-
Select Career paths in the dropdown.
-
Find the path and click the 3-dot icon.
-
Select Edit details to edit the path name, description, color, or tags
-
Select Edit jobs to add, reorder, or remove jobs from the path.
-
-
Make your changes and click Save.
How to duplicate a defined path
Create a path quickly by cloning an existing one. The new path will be a draft with the original name followed by (1) and will include the same details and jobs as the original. You can update the path details and jobs as needed, then publish it when you are ready.
-
Click Jobs in the top nav.
-
Click Jobs on the top left of the page.
-
Select Career paths in the dropdown.
-
Find the path and click the 3-dot icon.
-
Select Duplicate in the dropdown.
How to restore a defined path
Archived paths can always be restored. Once restored, the path will be in draft status. Note that until you republish the path, it will still appear archived in employee profiles.
-
Click Jobs in the top nav.
-
Click Jobs on the top left of the page.
-
Select Career paths in the dropdown.
-
Find the path and click the 3-dot icon.
-
Select Restore in the dropdown.
Removing defined paths
How to unpublish a defined path
The option to unpublish is intended as an undo action when you publish a path that’s not ready to go live. Only paths that haven't been saved to employee profiles can be unpublished. If you’d like to unpublish a path that has been saved, simply archive the path and then restore it.
-
Click Jobs in the top nav.
-
Click Jobs on the top left of the page.
-
Select Career paths in the dropdown.
-
Find the path and click the 3-dot icon.
-
Select Unpublish in the dropdown.
How to archive a defined path
You can archive a path that’s no longer relevant for your organization. Employees who have saved the path to their profile will see it highlighted in grey with a note that says 'This path has been archived' and an option to remove the path from their profile.
-
Click Jobs in the top nav.
-
Click Jobs on the top left of the page.
-
Select Career paths in the dropdown.
-
Find the path and click the 3-dot icon.
-
Select Archive in the dropdown.
How to delete a defined path
Deleting a path can’t be undone. Once deleted, the path will be removed from profiles and from the list of defined paths employees can choose from. Consider archiving instead if there’s a possibility that you’ll want to use the path again.
-
Click Jobs in the top nav.
-
Click Jobs on the top left of the page.
-
Select Career paths in the dropdown.
-
Find the path and click the 3-dot icon.
-
Select Delete in the dropdown.
-
Click Delete to confirm.